

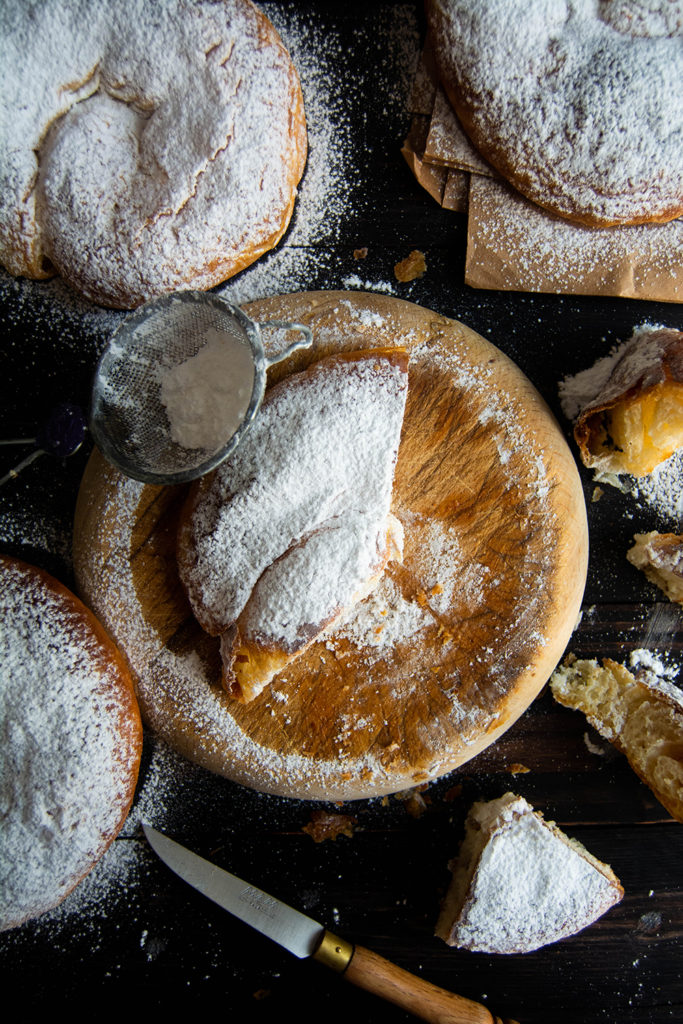

Whoever is from Mallorca, or who has visited the island during the holidays, knows that the ensaimadas are a classic that can never be missed. I’ve had the privilege to visit Mallorca several times since I have family there, and the original ensaimadas daily made by bakers are simply the best.
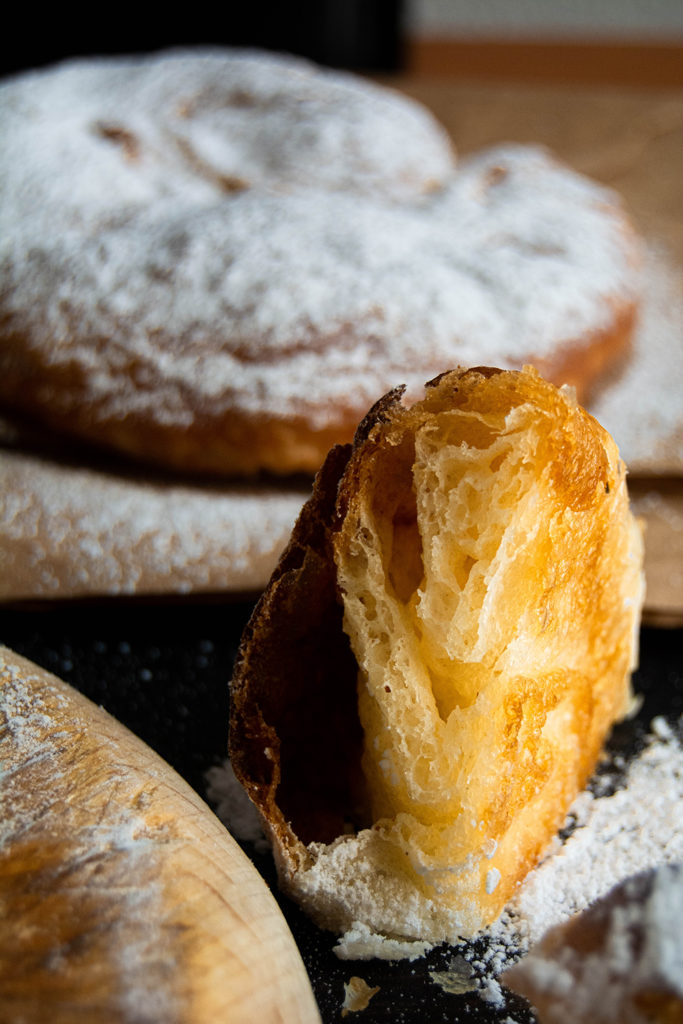
Unlike the ensaimadas that can be found in Barcelona, with a plane flavour and a briox-like finished texture, the flavour of the mallorcan ensaimadas stands out for its lard accent and the puff pastry is crispy on the first layer and soft on the inside. Personally, I like these two types of ensaimadas, but the one I like best and reminds me of a summer in paradise is the mallorcan style. That’s why I give you my version, so that you can enjoy it at home as if you were in a bakery in Mallorca without leaving your own house.
You will wonder why all the ensaimadas recipes you see need so many fermentation hours. Well, doughs that contain a high percentage of sugars take longer to rise, so they just simply need more time. I recommend you to prepare the ensaimadas during the evening and leave them to ferment all night long, so when the next day you wake up you can put them straight away in the in order to have a freshly baked breakfast worthy of a proper gourmand.
When making the recipe, it is very funny when gently you must stretch the dough until, literally, you can see through it. So, if you make it, please tell me how this step has come out in the comments down below or on my Bloody Delicious Instagram, where I’m always answering your DM questions.
Let’s bake!


MALLORCAN ENSAIMADAS
7 medium ensaimadas
· Ingredients ·
250 g strong flour 300W or more
1 large egg
25 g fresh yeast
50 ml water
25 ml whole milk
150 g lard
50 g sugar
· Step by step ·
- In a stand mixer, or in a big bowl, mix the flour with the crumbled yeast and the sugar.
- In a medium bowl beat the egg with the water and milk.
- Add these liquid ingredients to the dry ingredients in two times, allowing it to absorb well each time.
- Keep kneading for about 25 minutes, or until the gluten is well developed. To find out if the gluten is ok, take a piece of dough and carefully stretch it out with your fingers. Your gluten will be well formed if the dough is super stretched, is not breaking and is looking almost transparent.
- Let the dough rest for 10 minutes, so the gluten will relax and then you can work the dough well.
- Divide and roll the dough into little balls of approximately 60 g, you will have 7 balls.
- Let these balls rest with a kitchen cloth on top for 25 minutes.
- Roll out the dough with a kitchen rolling pin and add the lard. Be generous with the layer of lard, or they’ll end up dry.
- Now carefully, but fearlessly, stretch the entire dough little by little, trying to form a rectangle. Your dough will be well stretched when it looks almost transparent, it has to be very thin. It’s normal for the dough to break a little, don’t worry.
- Roll, by the longest part, the entire dough making a cylinder.
- Place this cylinder of dough on a tray with baking paper in a spiral. It is important that you leave room for the spiral to grow, otherwise, it will grow upwards and it will turn out to be a strange shape which is not the classic one.
- Put the baking tray inside your cold oven and turned off with the door closed, for 8 or 12 hours, it will depend on the environment temperature.
- Bake the ensaimadas with the heat from the top and the bottom on, at 180ºC from 10 to 12 minutes, they must be golden brown but not burned.
- Let them cool completely and sprinkle a good amount of icing sugar on top.
- Eat them preferably the same day when you baked them, the next day they start to get a little dry, but they are good if you dip them in coffee or hot chocolate, as we usually do.
· Tips ·
- If you prefer to use less fresh yeast let it ferment for a longer time, its maximum would be 20 hrs to ferment.
- You can always fill them with stuffed pumpkin, as usual, when you roll the dough before baking.
- You can also cut them in half, once they are baked and fill them with cream, I’ve made this option and they’re very tasty.
Enjoy!
Follow me on my social media:
Instagram
Pinterest
Facebook
I would love to see your take on my recipes, tag me or use the hashtag #bloodydelicious
All my social media links are in the sidebar, come and say Aloha!
Share and follow me for more recipes to come : )
Leave a Reply